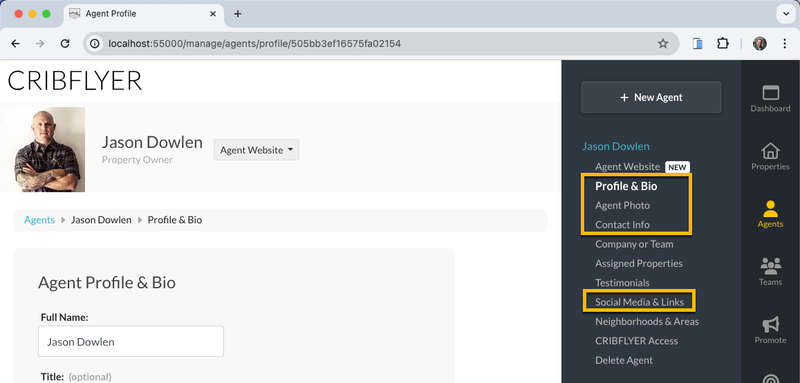
If you haven't done so already, add yourself as an Agent in the CRIBFLYER admin panel by clicking the New Agent button.
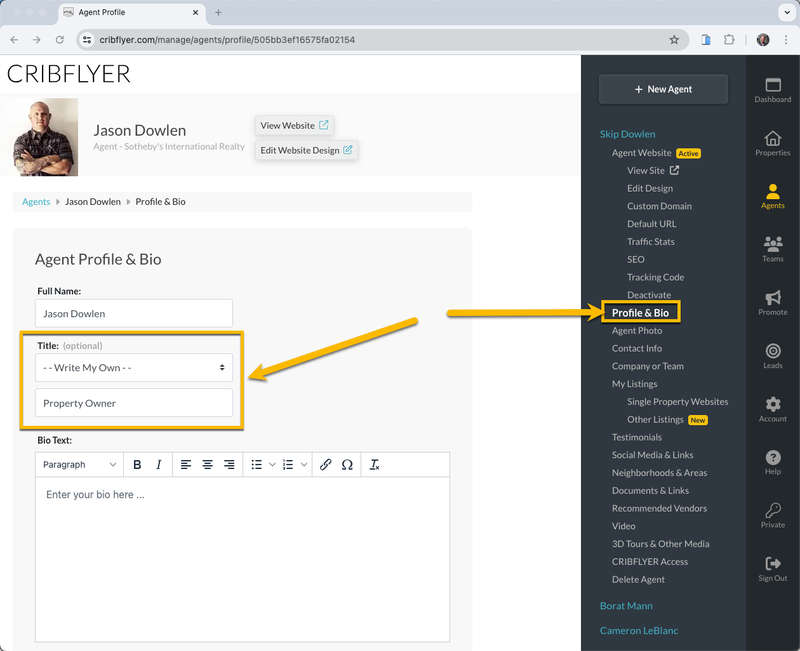
Then navigate to your Profile & Bio screen and select the option to Write My Own title. Then enter Property Owner in the field that appears.
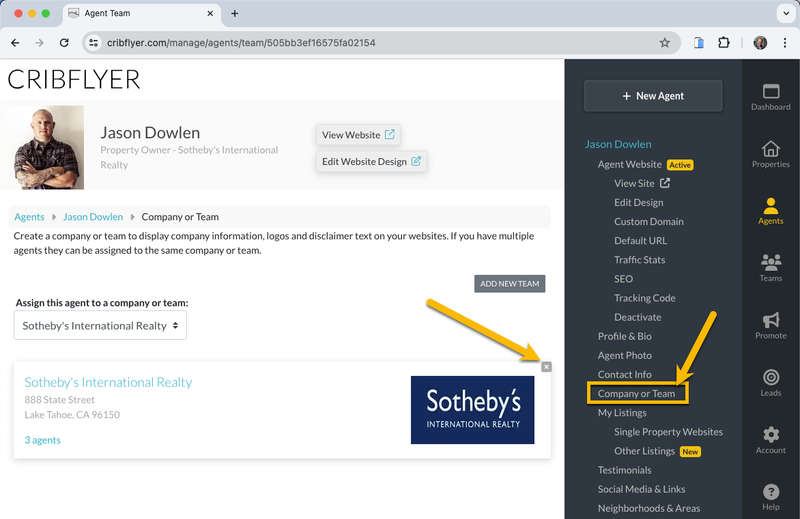
Next, navigate to your Company or Team screen and click the X icon to remove yourself from any teams.
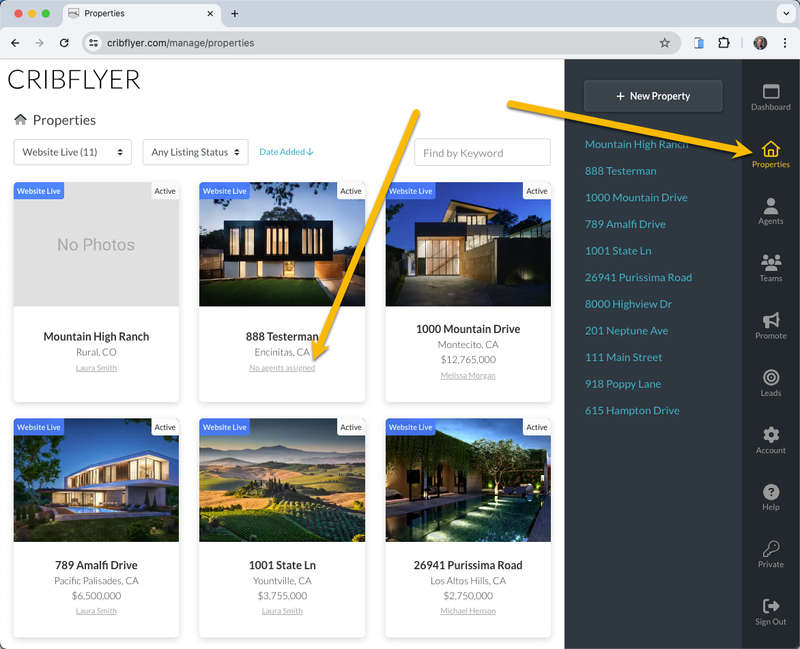
Then navigate back to the Properties section and find the desired property. If you're already assigned to the property your name will appear below the address. If not, then click the No agents assigned link.
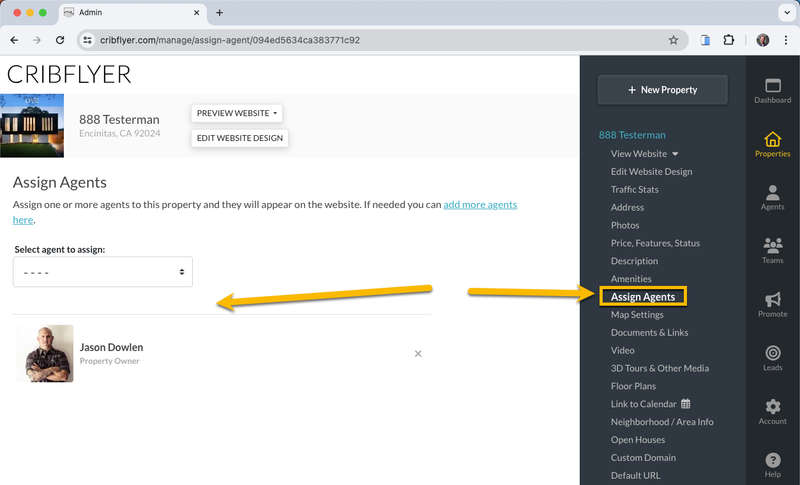
You should now be on the Assign Agents screen. If not click the Assign Agents link under your desired property.
Select your name from the drop down menu to assign yourself to the property. Now you will display as the Property Owner on the website.
Next, click the Edit Website Design button near the top of the screen or the link (with the same name) in the right sidebar menu menu.
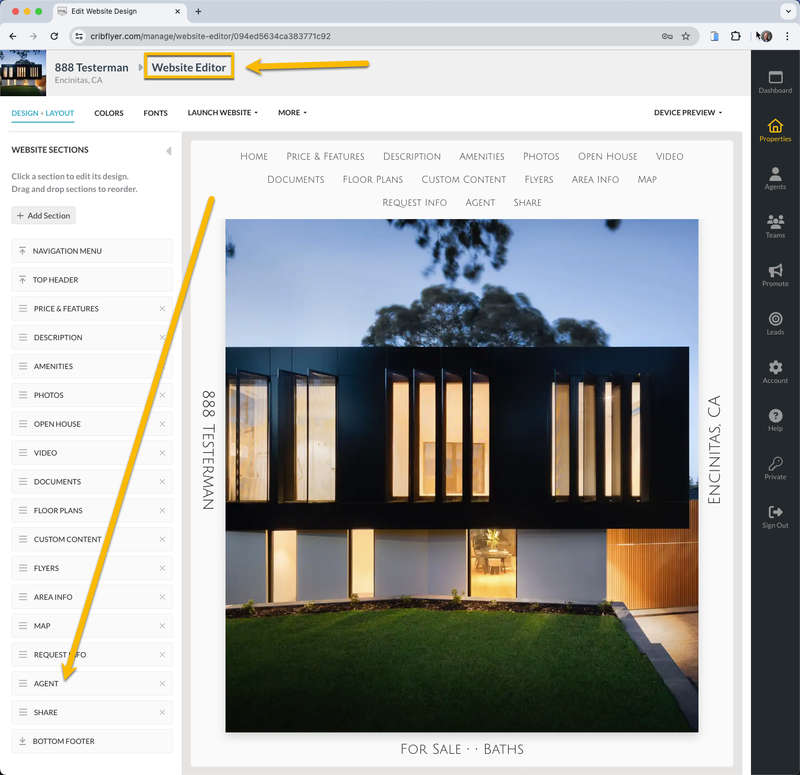
You should now be on the Website Editor screen. Click the Design & Layout button to open the Website Sections menu (if it's not already open).
Then find and click on the Agent section from the menu.
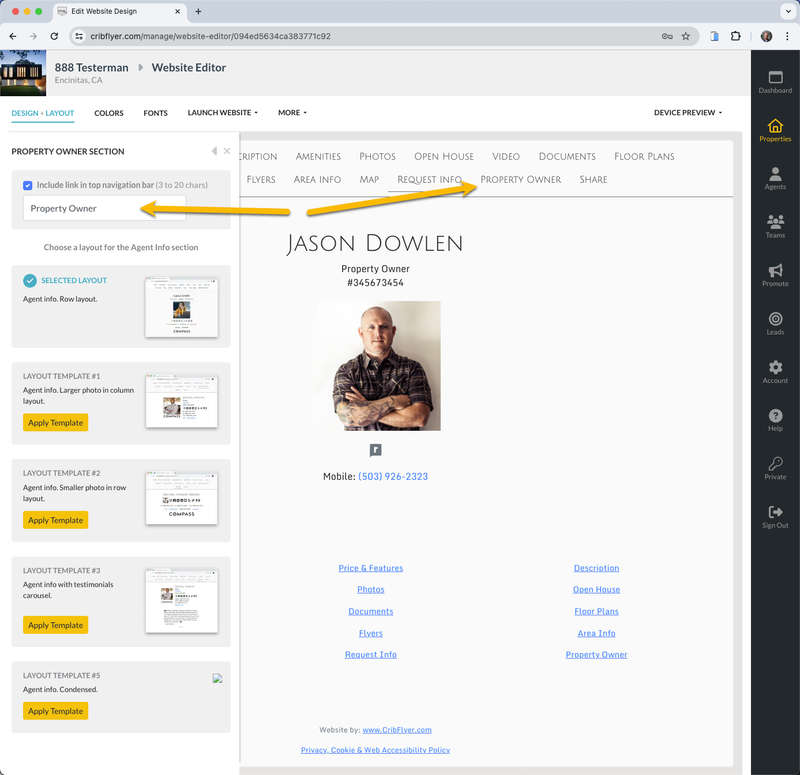
Change the name of the top navigation link for this section from Agent to Property Owner. After editing and clicking outside of the text box the changes will automatically save and update the website preview panel.
Now it's a good idea to return to the Agents section of your CRIBFLYER admin panel and make sure you've filled out all your contact information, etc. as the property owner on the respective screens. If you haven't already done so you can upload your photo, add links to your social media, add your bio, mobile numbers, etc. Everything you add will display on the property website and make it look even better.
